Antioch window installation guide
Window Installation in Antioch: Start with the rooms that overheat.
Start with the rooms that change most with afternoon sun. Our team reviews the opening, chooses an installation method, treats the surrounding edge, completes the finish work, and checks the installed window with you.

What we check before installation

A responsible installation conversation starts inside and outside the Antioch opening. Our team inspects the frame and sill, exterior cladding or stucco, interior trim, operation, visible staining or damage, access, nearby finishes, and the way water is intended to leave the wall.
Describe which rooms feel hot, cold, drafty, noisy, dim, or difficult to ventilate—and when the problem appears. The in-home inspection keeps the installation choice open until the frame and wall can be seen and measured in person.
What stays and what comes out

The Antioch installation line should identify retained materials, removal depth, sill preparation, fastening, insulation, sealants, drainage, and interior and exterior finish. Keep the glass package tied to the sun-facing room while the perimeter method responds to what inspection finds around that opening.
Our team begins by reviewing afternoon heat, glare, shade, operating problems, and how each room is used and inspecting existing frame condition, sash operation, ventilation needs, and the surrounding finish. The project plan carries the existing frame, water and air treatment, room protection, and finished edges through product selection, installation, finish, and the final walkthrough. The Antioch estimate should say what stays, what comes out, how the opening will be prepared, how water and air will be managed, how the window will be fastened and insulated, which sealants will be used, who completes the interior and exterior finish, and what happens if hidden damage appears.
Check each installed window

The installation sequence uses four clear checkpoints: Share the project priorities; Professional in-home measurement; Review exact products and installation; Confirm the written estimate and completed work. You should be able to compare every installed window with the room-by-room estimate instead of relying on a generic statement that the work is done.
At the Antioch walkthrough, operate and lock every window, inspect screens, glass, spacing, drainage openings, sealant and trim, confirm debris removal, and match labels and care documents to the room list. Revisit the priority sun-facing rooms while the work is still easy to identify.
Window installation
The work around the frame shapes the finished Antioch window.
Installation includes protecting the room, removing the old unit, preparing the opening, setting and sealing the new window, finishing the edges, and checking operation.
Use sun, airflow, views, and daily routines to filter the choices.
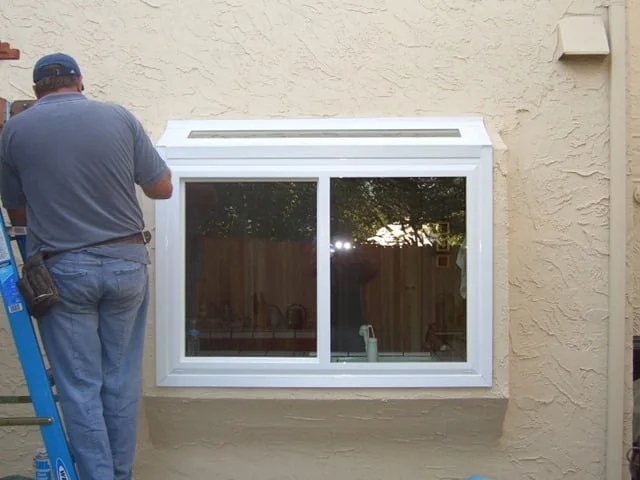
Follow the opening from start to finish
Ask how each window will be handled—not only what will be ordered.
A clear installation plan tells you how we will access the opening, protect nearby surfaces, address visible conditions, complete the perimeter, and leave the window working properly.
Discuss your installationConfirm room and floor protection
Review preparation, setting, fastening, insulation, and sealing
Include trim, cleanup, and operation checks
From room notes to a finished opening
Start with the rooms that overheat.
Our team begins by reviewing afternoon heat, glare, shade, operating problems, and how each room is used and inspecting existing frame condition, sash operation, ventilation needs, and the surrounding finish. The project plan carries the existing frame, water and air treatment, room protection, and finished edges through product selection, installation, finish, and the final walkthrough.

See the installation work in contextConnect home protection, careful removal, setting, water and air control, finished edges, cleanup, and operation checks to each Antioch room on the estimate.
Share the project priorities
Our team confirms the address, room, operation, desired result, and afternoon heat, glare, shade, operating problems, and how each room is used, using photographs when they clarify the existing conditions.
Professional in-home measurement
We measure each opening and inspect existing frame condition, sash operation, ventilation needs, and the surrounding finish before recommending a replacement method. We check concealed conditions when removal exposes them.
Review exact products and installation
The proposal states the exact glass and window configuration, removal and perimeter work, finish responsibilities, and exclusions, its assumptions, and the approval process for any condition that cannot yet be seen.
Confirm the written estimate and completed work
The final walkthrough reviews the existing frame, water and air treatment, room protection, and finished edges, operation, locks, screens, glass, reveals, sealant, trim, cleanup, labels, and promised documents.
Plan the next step
Before installation begins
Our team keeps the Antioch comfort observations, opening photographs, exact labels, and written estimate together from field measurement through the final operation and perimeter check.
- What you notice: afternoon heat, glare, shade, operating problems, and how each room is used
- Opening and wall: existing frame condition, sash operation, ventilation needs, and the surrounding finish
- Product goals: the room’s sun exposure, operating needs, visible glass, and comfort goals
- Written estimate: the exact glass and window configuration, removal and perimeter work, finish responsibilities, and exclusions
- Proposed materials to keep and remove
- Sealing, finish, access, protection, cleanup, and final walkthrough responsibilities